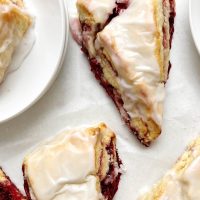
Flaky Raspberry Scones
These buttery, tender raspberry scones have both raspberry jam and fresh berries. The jam boosted flavor and help the berries adhere, and the scones bak up tall and lofty. A drizzle of icing while keeps the scones stay tender for hours after baking.
Servings 8 scones
Ingredients
- ½ cup [120 g] crème fraiche or sour cream
- 1 large egg
- 1 large egg yolk
- 1 teaspoon pure vanilla extract
- 2 ¼ cups [320 g] all-purpose flour*
- ¼ cup [50 g] granulated sugar
- 1 tablespoon baking powder
- ½ teaspoon fine salt
- 12 tablespoons [1 ½ sticks or 170 g] cold unsalted butter cut into ½ in [12 mm] pieces
- 2 tablespoons raspberry jam
- ½ cup [50 g] raspberries
- Heavy cream for brushing
Icing
- 2 to 4 tablespoons milk
- 1 tablespoon unsalted butter, melted
- ½ teaspoon pure vanilla extract
- Pinch salt
- 1 ½ cup [180 g] confectioners’ sugar
Instructions
- Line a sheet pan with parchment paper.
- In a medium bowl or liquid measuring cup, whisk together the crème fraiche, egg, egg yolk, and vanilla. Set aside.
- In the bowl of a stand mixer fitted with a paddle, combine the flour, granulated sugar, baking powder, and salt. Add the butter and mix on low speed until the flour-coated pieces are the size of peas.
- Remove the bowl from the mixer and use a spatula to fold the wet ingredients into the dry until just combined. Transfer the dough to a lightly floured surface and knead four to six times, until it comes together, adding more flour as necessary if the dough is sticky. Pat the dough gently into a square and roll it into a 12 in [30.5 cm] square, dusting with flour as necessary. Fold the dough into thirds, like a business letter. Fold the dough into thirds again by folding in the short ends, making a square. Transfer it to the prepared sheet pan and put it in the freezer for 10 minutes.
- Return the dough to the floured surface, roll it into a 12 in [30.5 cm] square, and spread the jam evenly over the top. Sprinkle evenly with the raspberries, gently pressing them into the jam. Fold the dough into thirds. Turn the dough over so it’s seam-side down, and gently roll out the dough into a 12 by 4 in [30.5 by 10 cm] rectangle. With a sharp knife, cut it crosswise into four equal rectangles, then cut each rectangle diagonally into two triangles. Transfer the scones to the prepared sheet pan and freeze the scones while the oven is preheating (freezing the scones help them retain their shape; scones can also be frozen for up to two weeks before baking).
- Meanwhile, position an oven rack in the middle of the oven and preheat the oven to 375F [190C]. Stack the sheet pan with the scones on another sheet pan (double-stacking the sheet pans helps prevent the bottoms of the scones from browning too quickly). Brush the tops of the triangles with a little heavy cream, making sure it doesn’t drip down the sides. Bake until the tops and bottoms are light golden brown, rotating the pans halfway through, 18 to 25 minutes.
For the icing
- While the scones are baking, in a medium bowl, whisk together the milk, melted butter, vanilla, and salt until smooth. Add the confectioners’ sugar and mix together, then whisk until well combined and smooth. Add more milk, 1 tablespoon at a time, to thin the icing to your preferred consistency; the icing should be thick but pourable.
- Transfer the top sheet pan to a wire rack and ice the scones immediately, using the back of a spoon or an offset spatula. Scones are best eaten the same day they are made.
Notes
- Throughout my recipes posted on this website, 1 cup of flour equals 142g. Please note that 1 cup of flour can range anywhere from 120g to 142g, depending on the baker or website. I found that after weighting many cups of flour and averaging the total, mine always ended up around this number. If I am posting a recipe from another cookbook, I will use whatever gram measure of flour used in that book, which is why you may see a few posts with a different cup measurement.
Different brands of flour have varying levels of protein, ranging from low to high, which can result in very different outcomes when baking. I’ve found Gold Medal all-purpose unbleached flour to be the best option for many of my recipes; I use it in all the baked goods that don’t use yeast. If you are using White Lily flour, please note that it is a low protein flour and doesn’t absorb liquid the same as regular all-purpose flours. Check the back of the flour bag for instructions on substituting it for regular all-purpose flours.